

Recording your screen and webcam can be a helpful way to create tutorials, share presentations or demos, or even record online meetings. Fortunately, there are several screen recording tools and techniques available that make this task easy and efficient. In this blog post, we will explore different ways to record your screen and webcam on a Windows or Mac.
Record Screen and Webcam Using Gemoo Recorder
Gemoo Recorder, as a top-notch recording tool in 2023, offers flexible options for screen recording. With 4 different recording modes to choose from, you can easily capture your screen according to your preference.
Not only can you record both camera and screen simultaneously, but Gemoo Recorder also enables you to capture screen and audio together. Alternatively, you have the option to record screen, camera, and audio separately, depending on your needs.
In this part, let’s take a closer look at how to use Gemoo Recorder to record your screen and webcam at the same time.
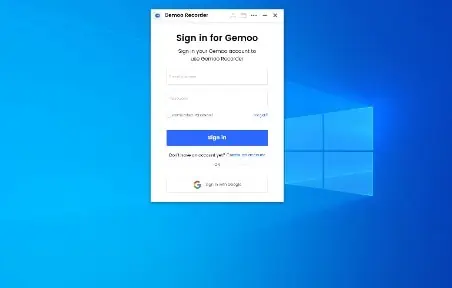
Step 1. To access Gemoo Recorder, simply launch the software on your computer and enter your account credentials to log in.
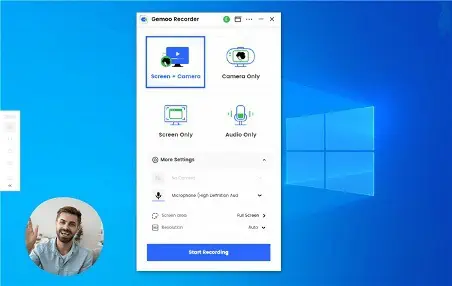
Step 2. You have the option to select the “Screen + Camera” mode, after which you can initiate the recording process by clicking on the “Start Recording” button.
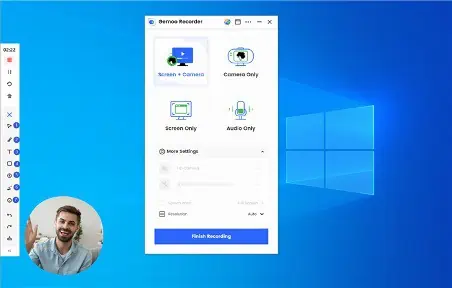
Step 3. As you start recording, the left sidebar will display a control panel where you can manage your recording process. From here, you can keep track of the recording duration, pause, resume or stop the recording, restart the recording, delete the recording, and add annotations as needed.
Once you finish recording, your video will be automatically uploaded to Gemoo and stored securely in the cloud. By default, your videos will remain private and can only be viewed with your permission. You have the flexibility to organize your videos by different views and cards, allowing you to easily manage and access your content. Additionally, you can share and collaborate with your teammates to enhance communication and teamwork.
Using Windows 10 Built-in Screen and Webcam Recorder
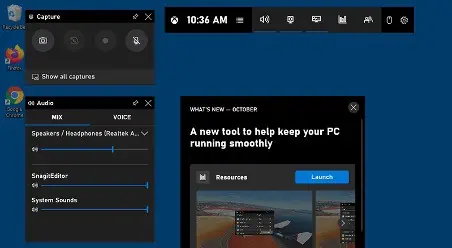
Windows 10 has a built-in screen and webcam recorder that is easy to use. To access this feature, press the Windows key + G to open the Game Bar. From there, you can select the Record icon to start recording your screen and webcam. Here are the steps to record your screen and webcam using the built-in feature:
The Game Bar also has other features like taking screenshots and broadcasting your gameplay. However, if you are not using a game, you may need to enable it first by going to Settings > Gaming > Game bar.
Step 1. Open the app or window you want to record on your screen.
Step 2. Press the Windows key + G to open the Game Bar. If this is your first time using the Game Bar, you may need to enable it first by going to Settings > Gaming > Game bar.
Step 3. Click the Record icon (a circle with a dot inside) to start recording your screen and webcam. You can also use the hotkey Windows key + Alt + R to start and stop recording.
Step 4. Once you have finished recording, click the Stop icon (a square) to end the recording.
Your recording will be saved to your Videos folder in a subfolder called Captures.
Note that the built-in Windows 10 screen and webcam recorder only records the active window, so if you want to record your entire screen, you will need to ensure that the window you want to record is in full-screen mode.
Record Screen and Webcam Using QuickTime Player (Mac)
QuickTime Player is a built-in screen and webcam recorder on Mac computers. It allows you to trim and split your recordings. Here are the steps to record your screen and webcam using QuickTime Player:

Step 1. Open QuickTime Player from your Applications folder.
Step 2. Click on “File” in the menu bar and select “New Screen Recording.”
Step 3. Click on the arrow next to the red record button and choose “Internal Microphone” or another audio source if necessary.
Step 4. Click on the record button and select the area of the screen you wish to record. If you want to record your entire screen, click and drag to select the entire screen. If you want to record a specific window, click on the window to select it.
Step 5. If you want to include your webcam in the recording, click on the arrow next to the record button and select the name of your webcam from the list of available cameras.
Step 6. Once you have selected the area of the screen and webcam settings (if applicable), click on the record button to start recording.
Step 7. When you are finished recording, click on the stop button in the menu bar or press “Command + Control + Esc” to stop the recording.
Your recording will be saved to your desktop by default. You can rename the file and choose a different location to save it if desired.
Note that QuickTime Player has limited editing capabilities, so if you want to edit your recording, you may need to use a separate video editing software such as iMovie or Adobe Premiere Pro.
Tips for Recording Your Screen and Webcam
Here are some tips to help you record your screen and webcam more effectively:
Use a good quality microphone: Audio quality is just as important as video quality, so make sure you use a good quality microphone to capture your voice.
Check your lighting: Make sure you have good lighting to avoid dark or blurry footage. If possible, use natural light or invest in a good-quality lighting kit.
Clean up your workspace: Make sure your workspace is clean and tidy to avoid distractions and make your recordings look more professional.
Practice before recording: Practice your presentation or demo before recording to avoid mistakes and make your recordings more concise and engaging.
Edit your recordings: Use video editing software to edit and customize your recordings. You can add annotations, animations, and effects, as well as trim and split your recordings.
FAQs about How to Record Screen and Webcam
1. What software do I need to record my screen and webcam?
There are many software options available for screen and webcam recording, both free and paid. Some popular options include Gemoo Recorder, OBS Studio, Camtasia, and Screencast-O-Matic.
2. How do I set up my webcam for recording?
Before you start recording, make sure your webcam is properly connected to your computer and positioned where you want it. You may also need to adjust the settings in your recording software to ensure the webcam is being captured.
3. How do I record my screen and webcam at the same time?
Most recording software will allow you to record both your screen and webcam simultaneously. Simply select the option to record both sources and adjust the placement and size of your webcam window as desired.
4. How do I edit my recorded video?
Once you’ve finished recording, you can use video editing software to edit your footage. Some popular options include Adobe Premiere Pro, Final Cut Pro, and iMovie.
5. How do I share my recorded video?
Once you’ve edited your video, you can share it on social media, your website, or other platforms. You may also want to consider hosting your video on a video hosting platform like YouTube or Vimeo. And Gemoo Recorder can also help upload recordings to the cloud and you can share them with your friends via a link.
Conclusion
There are several tools and techniques available that make this task easy and efficient. Recording your screen and webcam can be a great way to create engaging and informative video content.
With the right software and a little practice, you can create professional-quality videos that will help you connect with your audience. By following the ways above, you can create high-quality recordings that engage and inform your audience.